Let’s explore the process of establishing an SCCM Collection through the utilization of the Direct Membership Rule. Automation tools such as PowerShell or administrative services can be employed to script the direct membership rules effortlessly.
In the realm of SCCM, Collections hold paramount importance, demanding our utmost caution during their creation or modification. The formation of collections has the potential to introduce performance challenges to your environment.
Within this series of articles, I have penned several posts elucidating the intricacies of crafting collections, both static and dynamic. This particular entry is a valuable contribution to the SCCM Education series, wherein we delve into the realm of SCCM collections, specifically focusing on their static nature.
Understanding SCCM Collections: A Comprehensive Guide
Collections in System Center Configuration Manager (SCCM) are the cornerstone of resource organization and management within this powerful system. Think of collections as your virtual filing cabinets, where you can neatly categorize and manage SCCM resources, which typically encompass devices and users. In this guide, we’ll delve into the world of SCCM collections, exploring their significance, types, and how they streamline your administrative tasks.
Collections: Streamlining SCCM Resource Management
Collections, in essence, are your key to taming the vast SCCM resource landscape. By harnessing collections, you break down the complexity into manageable units, making it easier to oversee, control, and deploy actions to numerous devices and users simultaneously. Here are some invaluable insights into the role of collections:
- Organization: Collections serve as your organizational tool, allowing you to group SCCM resources logically and efficiently;
- Tagging: Through collections, you can apply tags, making it simpler to categorize and distinguish resources based on attributes like department, location, or hardware specifications;
- Efficiency: Performing operations on multiple resources simultaneously becomes a breeze with collections, reducing the need for repetitive tasks.
Types of SCCM Collections: Unveiling the Options
The world of SCCM collections is divided into two main categories: Built-in collections and Custom collections. Understanding these types is crucial for optimizing SCCM’s resource management capabilities.
1. Built-in Collections
Built-in collections are the foundational sets of predefined collections that come preloaded with your SCCM installation. These collections cater to various common scenarios and can be immensely useful right from the start. Here’s a closer look:
- Out-of-the-Box Convenience: Built-in collections are readily available, ensuring you have essential groupings right out of the gate;
- Time-Saver: They save you time and effort since they are preconfigured for common tasks and scenarios.
To identify built-in collections and learn more about them, consider referring to the video tutorial linked below. This resource will help you make the most of these collections and streamline your SCCM management further.
2. Custom Collections
Custom collections, on the other hand, are collections that SCCM administrators create according to their unique requirements. These collections offer flexibility and customization to cater to your organization’s specific needs. Here’s what you need to know:
- Tailored to Your Needs: Custom collections can be configured to match your client management objectives precisely;
- Unique Tagging: They allow you to apply tags and attributes that align with your organization’s specific criteria.
Additional Types of SCCM Collections
In addition to built-in and custom collections, SCCM introduces two more types that deserve your attention:
- Static Collections: Static collections maintain a fixed set of members, and resources do not automatically join or leave these collections based on rules. These are ideal for managing well-defined groups of resources with minimal changes;
- Dynamic Collections: Dynamic collections, in contrast, are rule-based. Resources automatically become members or leave based on specified criteria. These are excellent for managing resource groups that may change frequently, such as all laptops running a particular software version.
Also, saying goodbye to Windows 10 1803 has never been easier! Discover a hassle-free uninstallation guide in our latest article. Get rid of Windows 10 1803 now!
Creating Static SCCM Collections: A Comprehensive Guide
In the realm of Systems Center Configuration Manager (SCCM), creating static collections is a fundamental task that enables you to efficiently manage and organize your devices and users. This guide goes beyond the basics, providing you with an in-depth walkthrough on how to craft static collections in SCCM, equipping you with the knowledge to streamline your IT operations. Whether you’re new to SCCM or a seasoned pro, this guide will help you master the art of creating static collections that suit your organizational needs.
Step 1: Access the SCCM Console
- Open the SCCM console on your management server;
- Navigate to the “Assets and Compliance” section;
- Under “Device Collections,” right-click and select “Create Device Collection.”
Step 2: General Collection Settings
Now that you’re in the process of creating a static collection, it’s important to set the foundation by defining some key parameters:
- Name and Comment: Provide a descriptive name for your collection and add a comment if needed to provide context for other administrators;
- Limiting Collection: Choose a limiting collection by clicking “Browse.” The limiting collection serves as the basis for membership in your new static collection. Members of your static collection will be drawn from this limiting collection.
Step 3: Membership Rules
Static collections rely on direct membership rules, and SCCM offers flexibility in configuring these rules to suit your specific requirements. Here’s how to set up these rules:
- Direct Membership Rule: On the Membership Rules page of the Create Device Collection Wizard, select “DIRECT membership rule” from the Add Rule list. You can use this type of rule to precisely define the members of your collection;
- Multiple Rules: SCCM allows you to configure multiple rules for a single collection, providing granular control over membership. This is particularly useful when you want to include or exclude specific devices or users based on various criteria.
Step 4: Creating Static User Collections
Static collections are not limited to devices; you can also create static user collections in SCCM using the same principles outlined above. When you need to organize and manage users within your organization, follow these steps:
- Access the SCCM console and navigate to “Assets and Compliance.”;
- Under “User Collections,” right-click and select “Create User Collection.”;
- Proceed with the same general collection settings and membership rules as discussed earlier. Ensure you choose “DIRECT membership rule” to create static user collections.
Introducing the Direct Membership Rule Wizard
Welcome to the world of efficient resource management with the Direct Membership Rule Wizard. In this comprehensive guide, we’ll walk you through the process of creating a Direct Membership Rule that allows you to precisely select and organize resources within your system. This wizard streamlines the task of resource classification, ensuring you can harness the full potential of your resources.
Step 1: Accessing the Wizard
To get started, access the Create Direct Membership Rule Wizard. On the Search for Resources page, you will embark on a journey of customization and precision. Follow these 7-11 steps to achieve your resource management goals effectively.
Step 2: Choose the Resource Class
Now, let’s delve into the heart. In the ‘Search for Resources’ page, you’ll find a range of options to specify. Begin by checking the drop-down options for the Resource class. This step allows you to select the type of resource you wish to search for and subsequently add it to your collection.
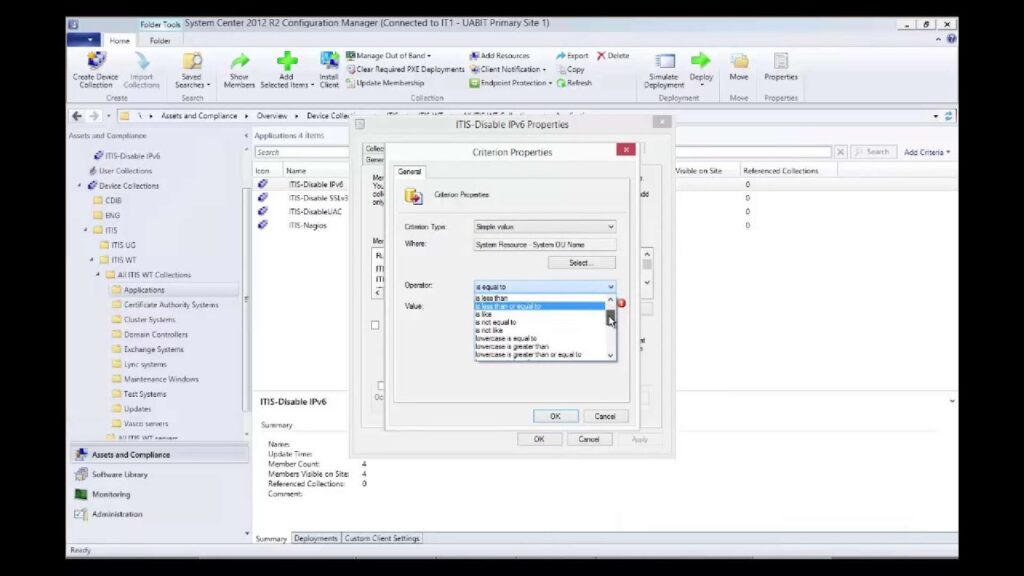
Step 3: Utilize System Resource Values
For even greater control and insight, explore the ‘System Resource values’ option. Here, you can access valuable inventory data returned from client computers. This feature empowers you with a deep understanding of your resources.
Step 4: Attribute Selection
Next, take a look at the drop-down options for ‘Attribute name.’ This is where you choose the attribute associated with the selected resource class that you want to search for. It’s crucial for fine-tuning your resource search.
Pro Tip: If you’re specifically interested in selecting computers by their NetBIOS name, opt for ‘System Resource’ in the Resource class list and ‘NetBIOS name’ in the Attribute name list.
Step 5: Optional Settings
Now, let’s consider some optional settings that can enhance your resource management experience:
Exclude resources marked as obsolete: If a client computer is marked as outdated, this option ensures that such resources are not included in your search results.
Recommendation: While the choice to exclude obsolete resources is not mandatory, we highly recommend testing it in your environment to assess its suitability.
Exclude resources without SCCM client: This setting allows you to filter out resources that do not have the SCCM client installed, streamlining your search results.
Tip: Evaluate the necessity of this option based on your environment’s requirements. It can be particularly useful in ensuring accurate resource selection.
Step 6: Set Your Search Value
Enter a specific value in the ‘Value’ field to narrow down your search. The use of the percent character (%) as a wildcard adds flexibility to your search. For instance, to find computers with a NetBIOS name starting with “Win11,” simply enter ‘Win11%’ in this field.
Step 7: Select Your Resources
Now it’s time to handpick the resources you want to add to your collection. In the ‘Resources’ list, carefully select the resources that align with your criteria. Then, proceed to the next step.
Step 8: Completion and Closure
Finally, your journey with the Create Direct Membership Rule Wizard concludes. Click on ‘Close’ to complete the wizard. To wrap up the process of creating a static collection with the direct membership rule, simply follow the ‘Next,’ ‘Next,’ and ‘Close’ buttons.
Expanding and Enhancing the Process of Adding a Device or User to a Static Collection in SCCM
When managing a network using System Center Configuration Manager (SCCM), one often encounters the need to include additional devices or users into static collections. Static collections are groups that don’t change dynamically; their membership is manually controlled. This guide provides an enriched, step-by-step approach to adding new devices or users to these collections, enhancing the process with best practices and tips for efficiency and effectiveness.
Detailed Steps to Add Devices or Users to Static Collections
Initiating the Addition: Begin by right-clicking on the device or user that needs to be added. From the context menu, select the “Add Selected Items” option. This action initiates the process of incorporating the selected entity into a collection.
- Selecting the Appropriate Collection: Upon clicking “Add Selected Items”, two choices will appear: “Add Selected Items to Existing Device Collection” or “Add Selected Items to Existing User Collection”. Choose the one that aligns with the type of entity you’re adding – a device or a user;
- Confirmation and Review: After making the selection, verify that the device or user has been correctly added to the desired collection. It’s always good practice to double-check to avoid any misplacements.
Best Practices for Managing Static SCCM Collections
- Patience is Key: After creating a collection or adding members, allow 2-3 minutes for the system to update and populate the collection. Premature actions such as ‘Update Membership’ or ‘Refresh’ can disrupt this process;
- Avoid Incremental Updates: For static collections, it is recommended not to use the “Use Incremental updates for this collection” option. Incremental updates are more suited for dynamic collections where membership changes frequently;
- No Need for Scheduled Full Updates: Typically, it is unnecessary to enable “Schedule a full update on this collection” for static collections. Given that these collections do not change frequently, regular full updates do not provide additional value and can consume unnecessary system resources.
Conclusion
In conclusion, we have embarked on a journey to understand the creation of SCCM Collections, particularly those rooted in the Direct Membership Rule. The utilization of automation tools like PowerShell and administrative services offers a streamlined approach to scripting these rules.
Throughout this series of articles, we’ve underscored the significance of SCCM Collections within the SCCM environment, emphasizing the need for meticulous attention during their creation or modification, considering their potential impact on performance.
As part of the SCCM Education series, we’ve explored various facets of SCCM collections, with this entry focusing on the static aspect. Armed with this knowledge, we are better equipped to navigate the intricacies of SCCM collections and leverage them effectively within our environments.